Autodesk Inventor iLogic using External DLLs
What is iLogic?
Autodesk Inventor iLogic is designed to extend the computational capabilities within Inventor, allowing users to include rules and more sophisticated design intent into models. Rules can be developed and organised using snippets and other code writing statements to run at given times to consistently do some of the work engineers and designers need to do.
I believe iLogic is a great tool that can help to automate Inventor without diving deep into complexities of full-scale add-in development. It offers an easy way to get started for people with no programming experience plus lots of code snippets that cover most of the needs for simple automation.
However, what if you need to do something that’s not included in iLogic by default? There’s a myriad of third-party (including Open-Source) .NET libraries that can help you to address specific automation needs.
In this post, instead of talking about these different libraries available to developers, I want to take the time look behind the curtain and help you extend the iLogic toolbox, using a simple example.
How to connect ClosedXML?
Let’s imagine that you need to import, export, and edit Excel files beyond the inbuilt iLogic capabilities. So, are there any existing tools that can help us to achieve what we want? If you come with this question to a professional programmer, most likely they will ask “Have you tried to find a NuGet Package?”
Yes, nuget.org provides tons of packages to accelerate .NET apps development and one of those is ClosedXML.
Unlike Visual Studio, the iLogic browser has no means to add NuGet packages to your project. So, we need to add it manually. Here are the steps to follow.
- Find a package on nuget.org
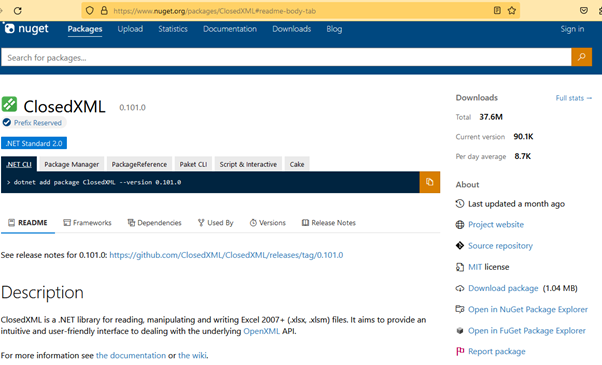
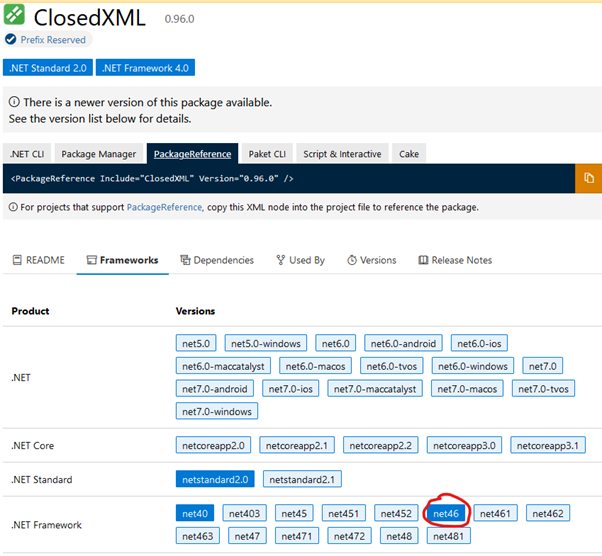
2. Check compatible frameworks. It’s important to note that the Autodesk Inventor supports .NET Framework 4.8, so we need to make sure that the package we’re trying to add is compatible with it. At the same time iLogic does not work with .NET Standard 2.0 libraries.
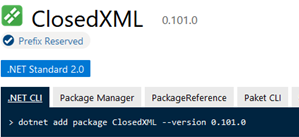
2. Check compatible frameworks. It’s important to note that the Autodesk Inventor supports .NET Framework 4.8, so we need to make sure that the package we’re trying to add is compatible with it. At the same time iLogic does not work with .NET Standard 2.0 libraries.
In this example the current version of the ClosedXML doesn’t directly support the .NET Framework. So, we can browse through the previous versions to get one made for .NET Framework. For example, ClosedXML 0.96 directly supports .NET Framework 4.6:
3. Click Download Package. In our example “closedxml.0.96.0.nupkg” will be downloaded.
4. There’s no secret that the *.nupkg files are zip archives, so you can see what’s inside by changing the file extension to ZIP or opening it with 7-ZIP or a similar application.
5. The recommended way to add DLLs to iLogic is to copy them to a special location: “iLogic Addin DLLs Directory”. To locate this folder, go to Tools -> Options -> iLogic Configuration:
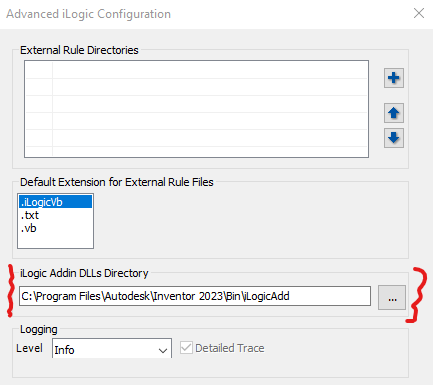
6. Copy the DLLs you want to use into this folder. In this example copy ClosedXML.dll from the “closedxml.0.96.0.nupkg\lib\net46\” to “C:\Program Files\Autodesk\Inventor 2023\Bin\iLogicAdd”
7. Now it’s time to try this DLL in iLogic. Start Inventor, create new part / assembly document and add a new rule.
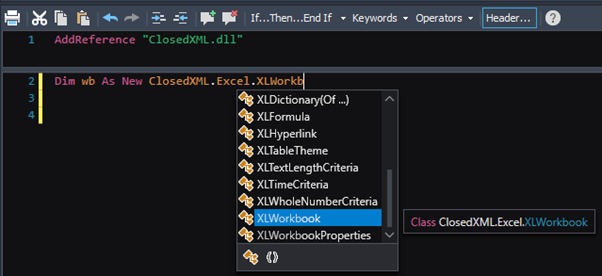
8. In the rule header type AddReference “ClosedXML.dll”, click “Save & Run”
9. Typically, if the DLL you’re trying to add depends on a .NET Framework and has no other dependencies, you’ll see the result immediately. However, in this example the ClosedXML.dll requires some additions such as: DocumentFormat.OpenXml, ExcelNumberFormat, and Microsoft.CSharp. You can find it by checking the Dependencies tab for this package on NuGet.

10. Now you just need to download additional packages from NuGet and copy them to the same folder. By the way, in my case there was no need to add Microsoft.CSharp because it comes from Global Assembly Cache.
11. Next, reopen the rule in the editor and begin using functionality from the recently added DLL. For example:

Donʼt hesitate to contact me
if you have any questions


